Building a Simple Quiz Chatbot With Twilio Autopilot and Serverless

The first chatbot can be dated back to 1966 when ELIZA was created at the MIT Artificial Intelligence Laboratory. Since then chatbots have developed significantly. Users interact via text or text-to-speech, and implementations range from detecting input using regular expressions and returning scripted responses to fully conversational AI featuring natural language processing, think Google Assistant or Amazon Alexa.
Twilio Autopilot is Twilio’s offering to build AI-powered chatbots which you can connect to a wide variety of channels, including Voice, SMS, Chat, WhatsApp and Facebook Messenger. In this article we’ll combine Twilio Autopilot with the Serverless Framework and AWS Lambdas to extend the functionalities of a chatbot. In a later article we’ll cover the conversational features Twilio Autopilot has to offer.
Our finished product will be a geography quiz where users can play Guess the capital (given a country the user must select the correct capital from a range of choices) or Guess the country (given the outlines of a country the user must select the correct country from a range of choices). The questions will be delivered and checked by Python Lambdas. The following short screen recording shows an interaction with the chatbot via WhatsApp.
Twilio Autopilot Definition
To develop and deploy a Twilio Autopilot from the command line first install the Twilio CLI and the Twilio Autopilot CLI Plugin. The former can be achieved using npm with npm install twilio-cli -g and the latter by running twilio plugins:install @dabblelab/plugin-autopilot.
To init the chatbot run twilio autopilot:init -p twilio-profile -n geography-quiz-bot, this will create a directory structure similar to this:
geography-quiz-bot/
├── ...
└── model
    └── schema.json
The schema.json holds the definition of our chatbot, copy & paste the following:
{
    "friendlyName": "Geography Quiz Bot",
    "logQueries": true,
    "uniqueName": "geography-quiz-bot",
    "defaults": {
        "defaults": {
            "assistant_initiation": "task://menu",
            "fallback": "task://menu",
            "collect": {
                "validate_on_failure": "task://collect_fallback"
            }
        }
    },
    "styleSheet": {
        "style_sheet": {
            "collect": {
                "validate": {
                    "on_failure": {
                        "repeat_question": false,
                        "messages": [
                            {
                                "say": ""
                            }
                        ]
                    },
                    "on_success": {
                        "say": ""
                    },
                    "max_attempts": 3
                }
            },
            "voice": {
                "say_voice": "Polly.Matthew"
            }
        }
    },
    "fieldTypes": [
    ],
    "tasks": [
        {
            "uniqueName": "collect_fallback",
            "actions": {
                "actions": [
                    {
                        "say": "I've got a bit lost now, apologies for that. Let's start again, how can I help you today?"
                    },
                    {
                        "listen": true
                    }
                ]
            },
            "fields": [],
            "samples": []
        },
        {
            "uniqueName": "capital",
            "actions": {
                "actions": [
                    {
                        "redirect": {
                            "uri": "https://xyz.execute-api.eu-west-2.amazonaws.com/dev/gqb/capital",
                            "method": "POST"
                        }
                    }
                ]
            },
            "fields": [],
            "samples": [
                {
                    "language": "en-US",
                    "taggedText": "capital"
                },
                {
                    "language": "en-US",
                    "taggedText": "Capital"
                },
                {
                    "language": "en-US",
                    "taggedText": "CAPITAL"
                }
            ]
        },
        {
            "uniqueName": "country",
            "actions": {
                "actions": [
                    {
                        "redirect": {
                            "uri": "https://xyz.execute-api.eu-west-2.amazonaws.com/dev/gqb/country",
                            "method": "POST"
                        }
                    }
                ]
            },
            "fields": [],
            "samples": [
                {
                    "language": "en-US",
                    "taggedText": "country"
                },
                {
                    "language": "en-US",
                    "taggedText": "Country"
                },
                {
                    "language": "en-US",
                    "taggedText": "COUNTRY"
                }
            ]
        },
        {
            "uniqueName": "menu",
            "actions": {
                "actions": [
                    {
                        "say": "Welcome to the Geography Quiz Bot!\nWhat mode do you want to play?\nType 'capital' for guess the capital and 'country' for guess the country."
                    },
                    {
                        "listen": true
                    }
                ]
            },
            "fields": [],
            "samples": [
                {
                    "language": "en-US",
                    "taggedText": "menu"
                },
                {
                    "language": "en-US",
                    "taggedText": "start"
                },
                {
                    "language": "en-US",
                    "taggedText": "hi"
                },
                {
                    "language": "en-US",
                    "taggedText": "hello"
                }
            ]
        }
    ],
    "modelBuild": {
        "uniqueName": "v0.1"
    }
}
It’s quite long so let’s break it down by looking at the first level of the dictionary:
{
    "friendlyName": "Geography Quiz Bot",
    "logQueries": true,
    "uniqueName": "geography-quiz-bot",
    "defaults": { ... },
    "styleSheet": { ... },
    "fieldTypes": [ ... ],
    "tasks": [ ... ],
    "modelBuild": { ... }
}
This sets:
- The name of the chatbot using
friendlyNameanduniqueName, - a configuration setting to log all queries made to the chatbot by setting
logQueriestotrue, defaultsfor the chatbot to fallback to,- a
styleSheetwhich sets the voice to be used and other items, - a list of
fieldTypesdefinitions if custom field types are used, - a list of
tasks, - and a string indicating the
modelBuildof the chatbot.
Looking at the tasks you can see we defined four tasks:
collect_fallback- This task is used whenever the response recognition encounters problems or hits the maximum number of attempts. It outputs a friendly message and then continues to listen for new task trigger words using"listen": true.capital&country- This is triggered when the user says capital or country. It fetches theactionsdefinitions via the endpoints noted in"redirect": {}, i.e. via one of the Python Lambdas we’re going to implement.menu- This is triggered when the user says hi, menu, or similar. It outputs a friendly message and then continues to listen for new task trigger words using"listen": true.
With all this in place let’s deploy the chatbot by running twilio autopilot:deploy -l debug --target model.
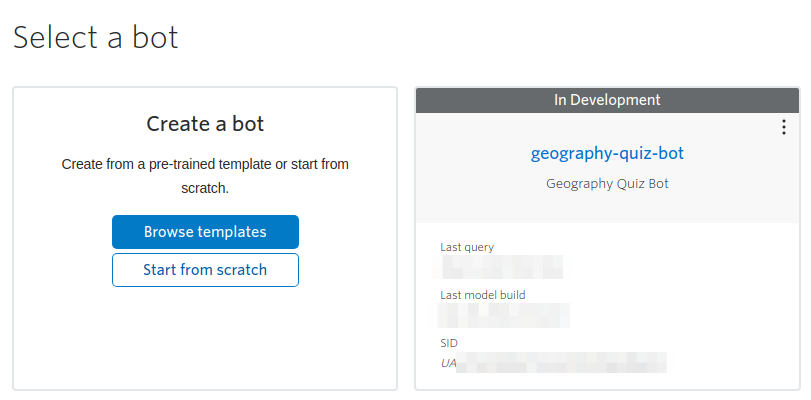
Head over to the Autopilot Overview in the Twilio Console and you should see the chatbot appearing.
Serverless Setup
To get started with Serverless first install the CLI using npm with npm install serverless -g.
To init the Serverless project run sls create --template aws-python --path geography-quiz-bot.
Our serverless.yml looks like this:
service: geography-quiz-bot

frameworkVersion: '2'

provider:
  name: aws
  runtime: python3.8
  region: eu-west-2
  profile: your-aws-profile
  tracing:
    apiGateway: true
    lambda: true
  lambdaHashingVersion: 20201221

resources:
  Resources:
    images:
      Type: AWS::S3::Bucket
      Properties:
        AccessControl: PublicRead
        BucketName: geography-quiz-bot-images
    imagesPublicReadPolicy:
      Type: AWS::S3::BucketPolicy
      Properties:
        Bucket: !Ref images
        PolicyDocument:
          Statement:
            - Effect: Allow
              Action:
                - 's3:GetObject'
              Resource: !Join
                - ''
                - - 'arn:aws:s3:::'
                  - !Ref images
                  - /*
              Principal: '*'

functions:
  capital:
    handler: handler.capital
    events:
    - http:
        path: gqb/capital
        method: post
  capital-check:
    handler: handler.capital_check
    events:
    - http:
        path: gqb/capital-check
        method: post
  country:
    handler: handler.country
    events:
    - http:
        path: gqb/country
        method: post
  country-check:
    handler: handler.country_check
    events:
    - http:
        path: gqb/country-check
        method: post
This defines a Serverless project with Python 3.8 as the main runtime. If you’re copying & pasting this make sure to adjust the AWS region & profile to match your details.
In resources we create a AWS S3 bucket which will hold the images of the country outlines for the guess the country mode, we’ll see later how we seed the data. We’re attaching a AWS S3 bucket policy so that the images are publicly accessible. We’ll reference them via the S3 bucket URL in our chatbot messages.
We define four functions: country and capital are the entry points matching the modes from the Twilio Autopilot definition, country-check and capital-check are used to check the users answer and forward to the main menu of the chatbot.
Next let’s look at the functions in detail.
Lambdas for the Capital Quiz
For the Lambdas we define two Twilio Autopilot Action templates which we can copy and fill, they look like this:
BODY_QUESTION = {
    'actions': [
        {
            'remember': {}
        },
        {
            'collect': {
                'name': 'questions',
                'questions': [
                    {
                        'question': '',
                        'name': '',
                        'validate': {
                            'on_failure': {
                                'messages': [
                                    {
                                        'say': 'Please answer by typing A, B, C or D.'
                                    }
                                ]
                            },
                            'allowed_values': {
                                'list': ['a', 'b', 'c', 'd', 'A', 'B', 'C', 'D']
                            },
                            'max_attempts': {
                                'redirect': 'task://collect_fallback',
                                'num_attempts': 3
                            }
                        }
                    }
                ],
                'on_complete': {
                    'redirect': ''
                }
            }
        }
    ]
}

BODY_ANSWER = {
    'actions': [
        {
            'say': ''
        },
        {
            'listen': True
        }
    ]
}
This should be familiar by now as this is exactly an Action definition like we supplied for schema.json, turns out if we do a redirect all we need to reply with is a set of Action definitions as a JSON and Twilio Autopilot will take those and perform the actions. For the question we have a remember and collect part and for the answer a say and listen part. With remember we use the Twilio Autopilot memory to store information across multiple steps. collect aids us in collecting the answer from the user, in this case the user can only type A, B, C or D and our Action definition ensures this.
def capital(event, context):
    body = copy.deepcopy(BODY_QUESTION)
    choices = list(data.COUNTRY_TO_CAPITAL.keys())

    answer_keys = []
    random_answer_key = random.choice(choices)
    while len(answer_keys) < 4 and random_answer_key not in answer_keys:
        answer_keys.append(random_answer_key)
        random_answer_key = random.choice(choices)

    answers = {c: {
        'country': answer_keys[i],
        'capital': data.COUNTRY_TO_CAPITAL[answer_keys[i]],
    } for c, i in zip(['A', 'B', 'C', 'D'], range(4))}

    correct_choice = random.choice([(0, 'A'), (1, 'B'), (2, 'C'), (3, 'D')])

    body['actions'][0]['remember'] = {
        'correct_answer_idx': correct_choice[0],
        'correct_answer_key': correct_choice[1],
        'correct_answer_country': answers[correct_choice[1]]['country'],
        'correct_answer_capital': answers[correct_choice[1]]['capital'],
    }
    question = f"What's the capital of {answers[correct_choice[1]]['country']}?\n"
    question += "\n".join([f"{option}) {answer['capital']}" for option, answer in answers.items()])
    body['actions'][1]['collect']['questions'][0]['question'] = question
    body['actions'][1]['collect']['questions'][0]['name'] = 'capital'
    body['actions'][1]['collect']['on_complete']['redirect'] = \
        'https://xyz.execute-api.eu-west-2.amazonaws.com/dev/gqb/capital-check'

    response = {
        'statusCode': 200,
        'body': json.dumps(body)
    }

    return response
This is the Lambda which creates a random guess a capital question. For that it picks a random choice from COUNTRY_TO_CAPITAL, which is a list formatted like this COUNTRY_TO_CAPITAL = {Afghanistan": "Kabul", "Albania": "Tirana", ...}, selects further three random answers for the remaining options and fills in the template, i.e. in remember we store the correct choice in order to be able to check the answer when the user responds. The collect part is filled with the dynamically created question, note that on completion we’re redirecting to the capital-check Lambda to check the answer.
def capital_check(event, context):
    body = copy.deepcopy(BODY_ANSWER)

    event_body = parse_qs(event['body'])
    memory = json.loads(event_body['Memory'][0])

    if memory['correct_answer_key'].lower() == \
       memory['twilio']['collected_data']['questions']['answers']['capital']['answer'].lower():
        say = "Yes you're right, "
    else:
        say = "No that's wrong, "
    say += f"{memory['correct_answer_capital']} is the capital of {memory['correct_answer_country']}."

    body['actions'][0]['say'] = say

    response = {
        'statusCode': 200,
        'body': json.dumps(body)
    }

    return response
All we need to do here is extract the users answer (stored in the memory under twilio/collected_data/questions/answer/question_name/answer) and compare it to the correct answer which we stored in the custom part of the memory (correct_answer_key in our case).
Lambdas for the Country Quiz
Seeding Data
The country outlines for the guess the country mode are created with the following Python script:
#!/usr/bin/env python3
# encoding: utf-8

import boto3
import cartopy
import cartopy.io.shapereader as shpreader
import matplotlib.pyplot as plt


boto3.setup_default_session(profile_name='your-aws-profile')
s3_client = boto3.client('s3')
bucket = 'geography-quiz-bot-images'

shpfilename = shpreader.natural_earth(
    resolution='10m',
    category='cultural',
    name='admin_0_countries'
)
reader = shpreader.Reader(shpfilename)
countries = reader.records()

allowed_types = ['Sovereign country', 'Country', 'Dependency']
filtered_countries = [country for country in countries if country.attributes['TYPE'] in allowed_types]
print('Number of countries:', len(filtered_countries))

for country in filtered_countries:
    name_long = country.attributes['NAME_LONG']
    iso = country.attributes['ADM0_A3']
    filename = f"{name_long.replace(' ', '_')}-{iso}.png"
    ax = plt.axes(projection=cartopy.crs.PlateCarree())
    ax.add_feature(cartopy.feature.LAND)
    ax.add_feature(cartopy.feature.OCEAN)
    ax.add_feature(cartopy.feature.BORDERS, linestyle='-', linewidth=.25)
    ax.outline_patch.set_edgecolor('grey')
    bounds = [coord for coord in country.geometry.bounds]
    ax.set_global()
    ax.set_extent([bounds[0], bounds[2], bounds[1], bounds[3]], cartopy.crs.PlateCarree())
    ax.add_geometries(
        country.geometry,
        cartopy.crs.PlateCarree(),
        facecolor=('#9CCC9C'),
        label=iso,
        edgecolor='grey',
        linewidth=.25
    )
    plt.savefig(filename, bbox_inches='tight', pad_inches=0.0, dpi=300)
    plt.clf()
    s3_client.upload_file(filename, bucket, filename, ExtraArgs={'ContentType': 'image/png'})
Note that the code is simplified and error handling is omitted. We use cartopy, a package designed for geospatial data processing, to retrieve the shapes of sovereign countries and matlplotlib to plot a png file.
shpfilename holds the shape file we’re going to use with the cartopy shapereader. The reader object is formed and the read with:
reader = shpreader.Reader(shpfilename)
countries = reader.records()
We need to filter the list as it contains also shapes of non-sovereign countries.
Next we iterate over all countries, plot and upload them to a AWS S3 bucket:
ax = plt.axes(projection=cartopy.crs.PlateCarree())
[...]
ax.add_geometries(...)
plt.savefig(filename, bbox_inches='tight', pad_inches=0.0, dpi=300)
[...]
s3_client.upload_file(filename, bucket, filename, ExtraArgs={'ContentType': 'image/png'})
This is all pretty straight-forward except getting the bounding box of the shape and setting the extent of the plot so that the map is centered and zoomed in on it.
In the end we have a png file for each sovereign country in our AWS S3 bucket, see the serverless.yml on how we define the AWS S3 bucket.
Connecting the Chatbot to WhatsApp
Lastly we need to connect our brand new chatbot with WhatsApp, there’s a couple of steps involved:
- First get a phone number with Twilio
- Next you need to get the Twilio phone number approved to be used with WhatsApp, this can take some time but you can test with the Twilio Sandbox for WhatsApp in the meantime
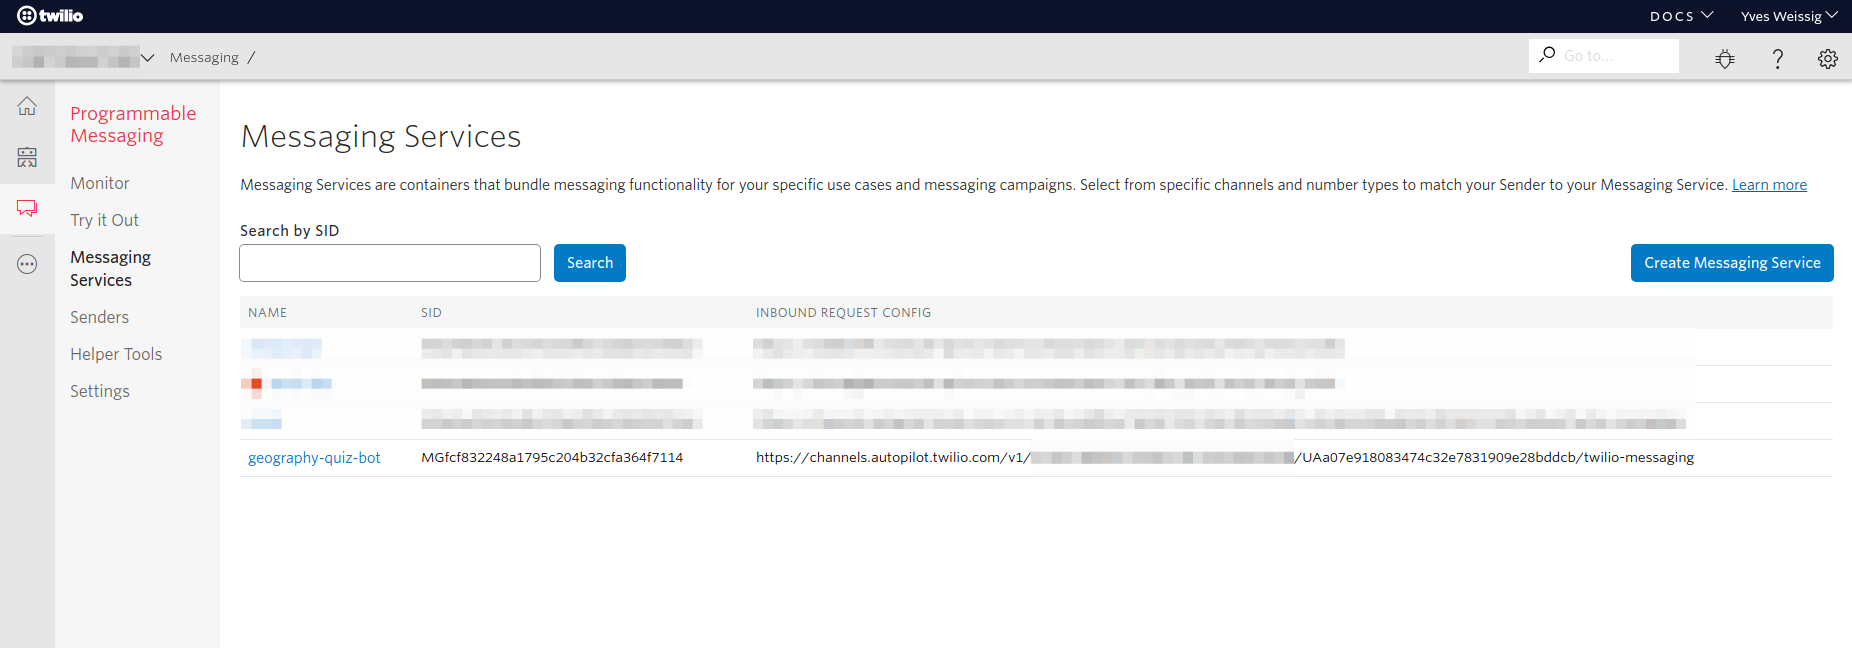
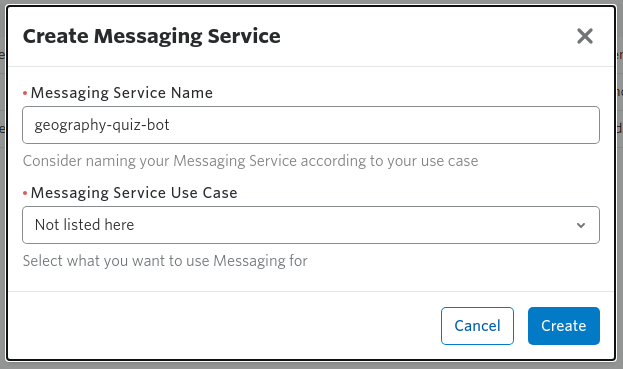
- The easiest way to connect the chatbot with the phone number is by creating a Messaging Service, to do this:
- Go to the Programmable Messaging section in the Twilio Console
- Go to Messaging Services in the left hand menu

- Click on Create Messaging Service and give your new messaging service a name before you confirm
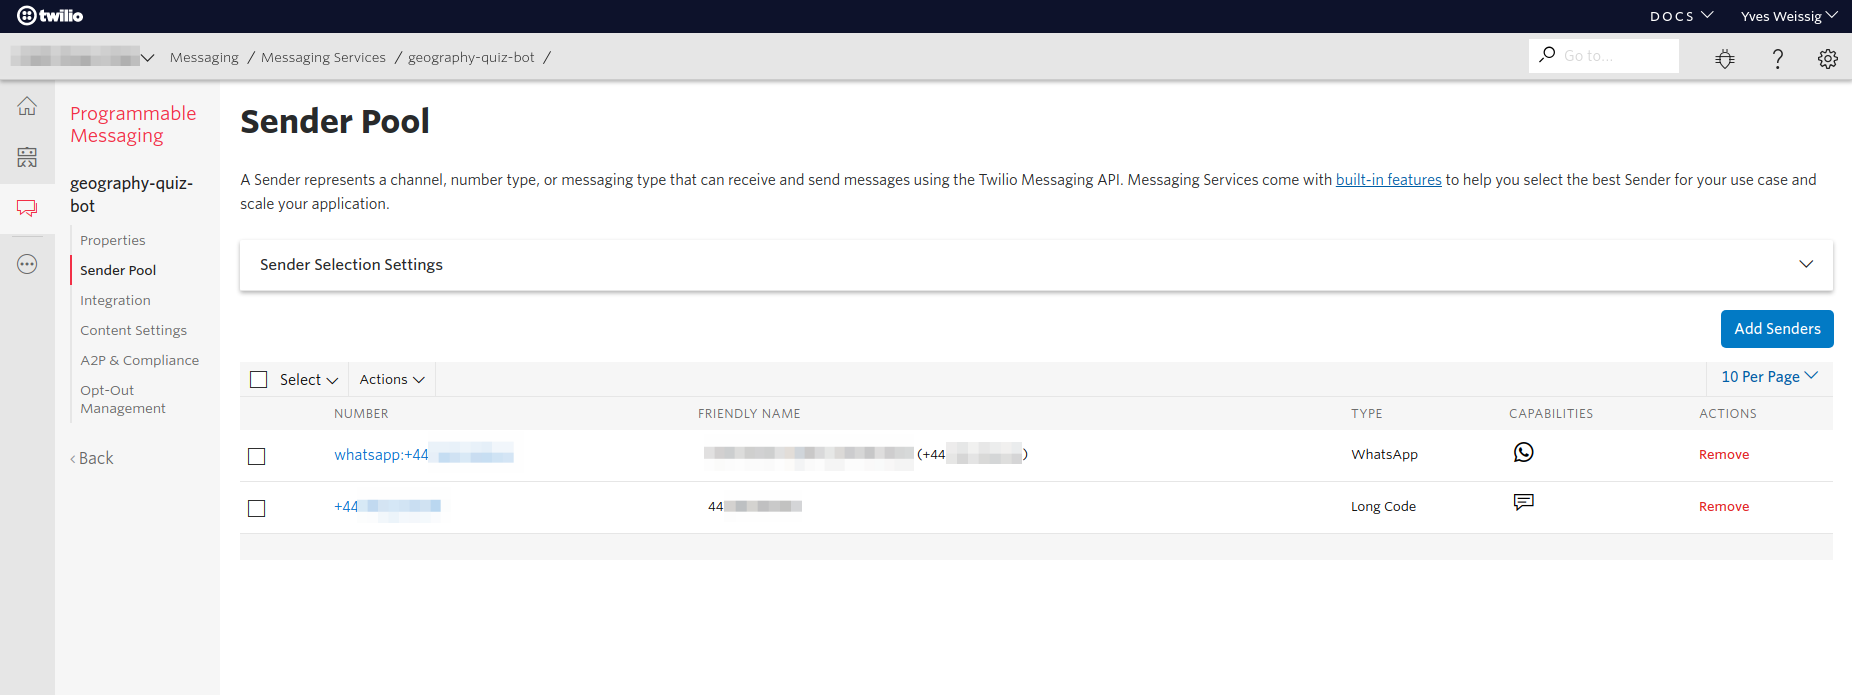
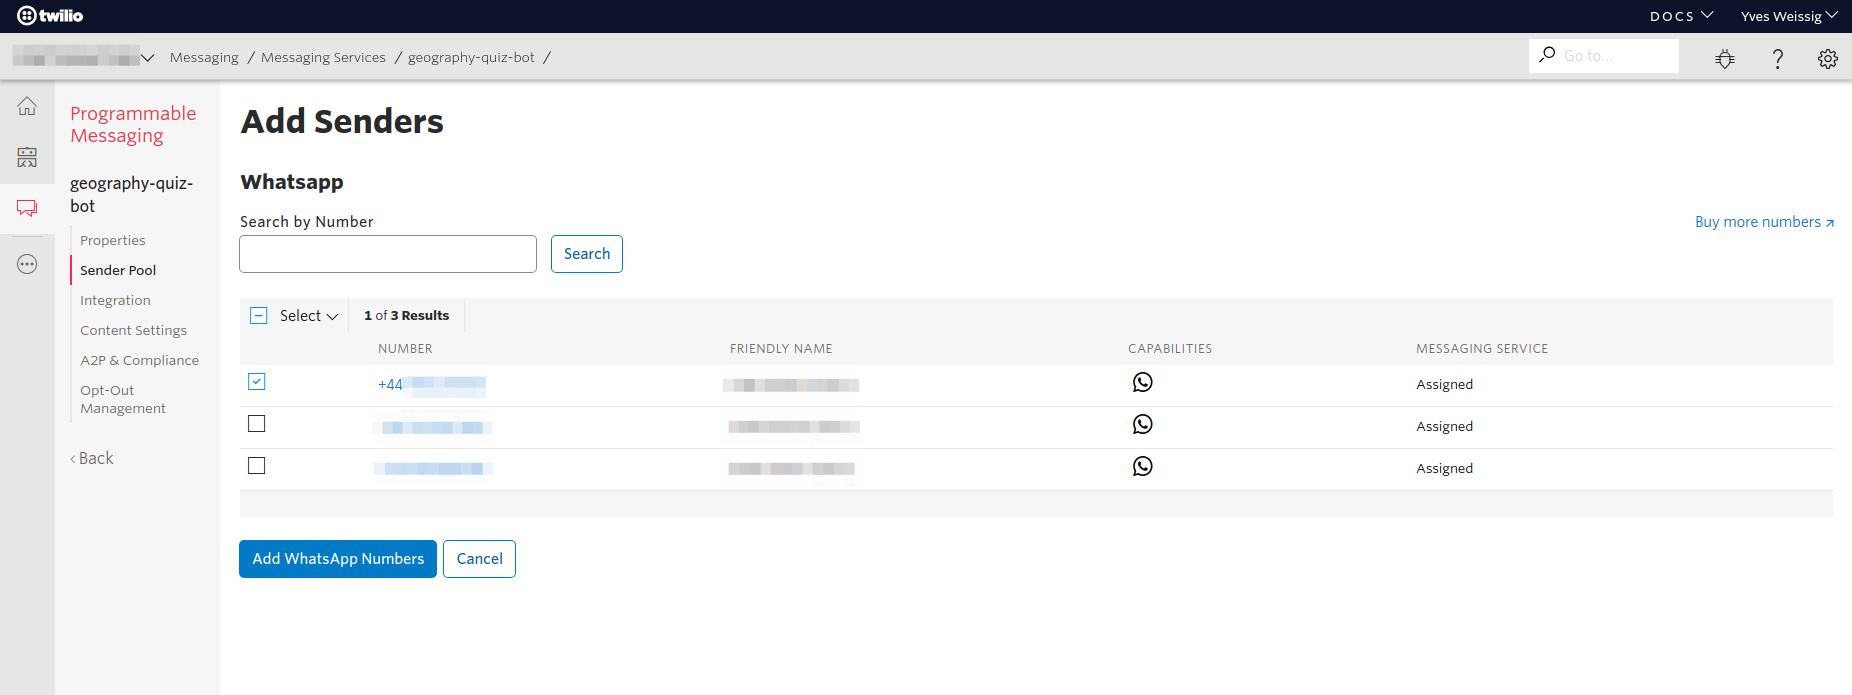
- Now we need to add a phone number to the messaging service, i.e. we need to fill the sender pool
- Go to the detail page of the messaging service
- Go to Sender Pool in the left hand menu
- Click on Add Senders and add a WhatsApp capable phone number (select Whatsapp for that and make sure the phone number starts with
whatsapp:)
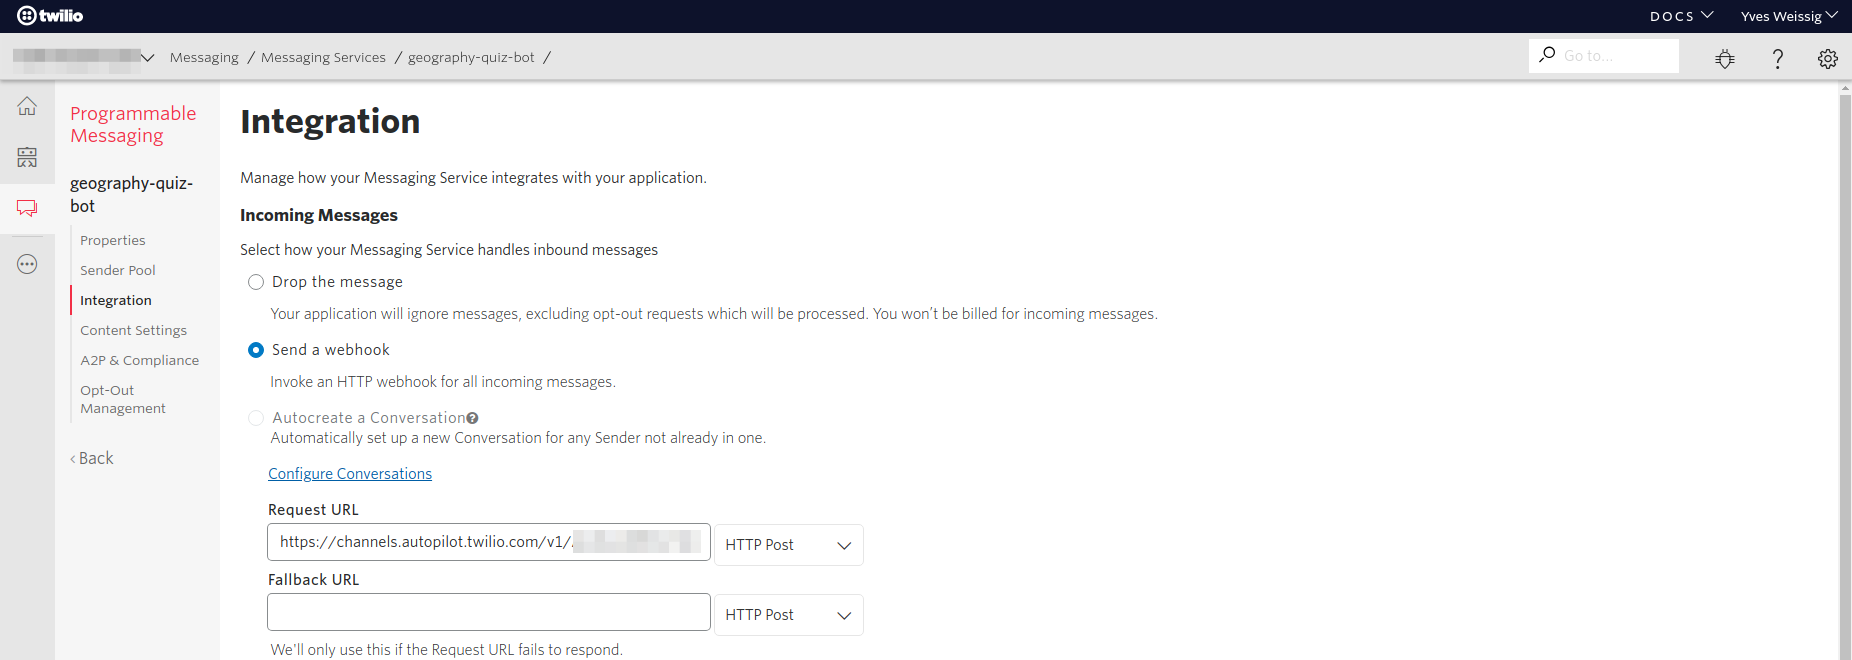
- Finally set up the integration for the messaging service, i.e. we need to connect to the Autopilot webhook
- Go to the detail page of the messaging service
- Go to Integration in the left hand menu and select Send a webhook and fill in your Twilio Autopilot webhook URL in Request URL